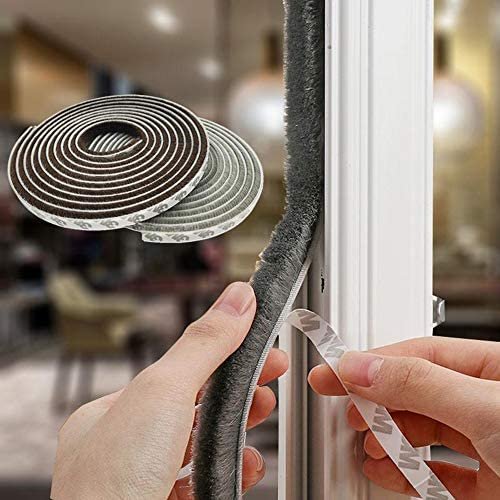
Adding weather stripping to your house is a cheap and easy way to save money on your energy bills. Sealing your doors correctly can keep out drafts, reduce heat loss, and help you save money on your heating and cooling costs.
In this detailed tutorial, you will learn everything from why weather stripping is essential to how to install it on your doors properly.
How Does Weatherstripping Work?
Foam, rubber, and metal are just a few of the materials used to make weatherstripping. Weatherstripping functions by compressing to form a seal when a door or window is closed.
Because air is prevented from escaping through the cracks, your house will be more comfortable year-round.
Why Weather Stripping Matters for Energy Efficiency
Cracks and holes in your doors, particularly older ones, may cause air to flow out and reduce your home’s insulation. Drafts from these air leaks are the source of heat loss in the winter and heat gain in the summer.
By filling up these cracks and crevices with weather stripping, you can keep the weather outside where it belongs and the comfort inside where it belongs. As a result, a lot of power is saved.
Types of Weather Stripping Materials
Weatherstripping may be made from a number of different materials, each of which has its own set of benefits and uses. Some examples of typical forms are shown below.
- V-strip or tension seal: It may be easily cut to size and is available in vinyl or metal. These door hinges are perfect for standard to heavy use.
- Door sweep: An elastic band seals the door’s threshold against drafts. Designed to fit bigger bottom door gaps.
- Foam tape: Foam tape that sticks to itself and can be trimmed to fit any need. It may be quickly and cheaply mounted on door jambs and stops.
- Door shoe: A stiff strip fastened to the door’s threshold to provide a seal. Perfect for those who have a door with a broken or uneven threshold.
- Reinforced felt: Strips of felt that have been strengthened with metal or plastic. It is an efficient gap sealer for openings of varying sizes.
Step-by-Step Guide to Weather Stripping Installation
- Identify air leaks: Inspect the threshold, the frame, and the space between the door and the frame when the door is closed for any gaps or cracks.
- Measure and cut: To ensure a secure fit, measure the desired length of weather stripping and add a little overlap. Separate the strips as needed.
- Clean the surfaces: The door frame, threshold, and stop must be clean and free of any old adhesive for the new one to stick properly.
- Apply the weather stripping: Apply the weather stripping material starting at the top of the door frame and following the directions on the packaging. If you want a good seal, you need to press hard.
- Test for proper sealing: Test for drafts by shutting the door and looking for places where weather stripping is needed. Just tweak it and add what you need.
Benefits of Weather Stripping on Energy Bills
- Reduced heating and cooling costs: Sealing air leaks may save heating and cooling costs by limiting heat loss in the winter and preventing heat gain in the summer.
- Enhanced comfort: Having weather stripping installed may help keep the heat in during the winter and the cold out during the summer.
- Increased HVAC system efficiency: Your heating and cooling systems will be able to run more effectively, using less power to make up for air leakage.
- Environmental impact: Saving power helps cut down on carbon dioxide released during the generation of electricity.
Conclusion
Improving your home’s energy efficiency via the use of weather stripping may save you money and time. Eliminating drafts, cutting down on energy waste, and lowering your energy costs are all possible results of sealing your doors correctly.
By following the advice in this article, you can make your home more eco-friendly and pleasant by selecting the appropriate weather-stripping material for your doors.


